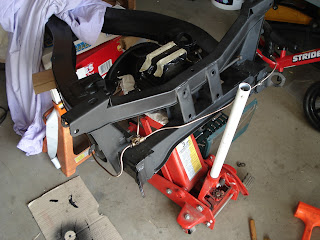
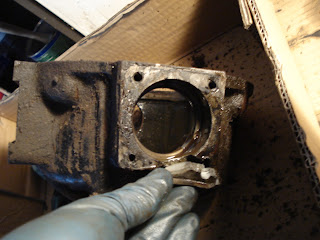
Changed one of the UJ. Easy with the press.
The grease nipple seemed in the way so i cut and sliced a small screw to put in place.
Note to self for the next one, might as well grease it before installing it's way easier !
I will try to keep this blog updated with my progress on my new project : a 1967 triumph spitfire mk3. Hoping this will help others and hoping I will get help as I would like to do things right.
Wednesday, May 29, 2013
Sunday, May 26, 2013
Saturday, May 25, 2013
Spitfire rear spring like new
Should add a before/after picture really...
Cleaned and repainted each leaves and used plastic buttons (from the ebay guy) instead of the rubber ones. Hopefully these will never wear out.
It raised the spring so i am trying to have a cheap spacer built.
Looking good, now on to the rear hubs.
Cleaned and repainted each leaves and used plastic buttons (from the ebay guy) instead of the rubber ones. Hopefully these will never wear out.
It raised the spring so i am trying to have a cheap spacer built.
Looking good, now on to the rear hubs.
Sunday, May 12, 2013
The differential is in !
I have to start with the photo of the spitfire differential landing into position. That felt good !
Trouble started when I opened the diff and noticed a cracked case. A previous owner had rebuilt with some sort of glue...
Luckily the spitfire community is amazing and Steve from Vegas sent me an other case just for the price of shipping ! Thanks Steve !
Although the outside needs a good clean and paint the inside looked ok and was not making any noise so it's just new oil seals and outside bearings. See previous post for the side seals.
For main pinion seal, pretty straight forward. Remove the nut. (Count the number of turns if you have a later differential)
Remove the flange.
And pop the seal out. Now that was the only part that took me a while, nothing could set it loose, so I ended up welding a little stick to it and pulled it with the slide hammer.
New paper gasket, refill with fresh oil and hopefully good for a lifetime !
Tuesday, May 7, 2013
Triumph spitfire differential bushings
That crazy differential has really taken me a lot of time. Of course now I have done I could probably do all of it in a few hours, but when it's the first time...
These bushing are solidly in there and the problem is that the surface is not flat to push and kind of awkward to access. So I had to remove the plastic part, make a cut on it and push it through.
Read about setting it on fire, but much easier if you have one of these round saw things
Nothing a hammer can't fix
Asked for assistance from the chief mechanic
And it comes out
Difficult to push them back in because the really have to be forced in there but they need to go in straight. Trick stolen from wheeler dealers, worked great to get it started aligned.
Finish on the press et voila !
Friday, May 3, 2013
Triumph spitfire differential rear oil seal and bearings replacement
I ordered new side seals for the differential thinking "yeah I'll just slap those on while I am there".
Found bits on the web with how to do, took me a while to figure out. So here is the full job with photos, maybe it'll save you some time.
First step, take out the snap ring.
Then capture the bearing with one of these bearing extractor tool. Could not have done it without it because the gap to catch the bearing is so small there is no way to rig something up.
I prefer to catch at the bearing than from the flange below because I tried from the flange on a spare one and it started bending.
Put it in the press and apply the tons ! Beware, it will take a lot of pressure and come out with a bang.
Push the old seal out with the right size sockets
Press the new seal in
Ready for installing the new bearing. At less than $10 per bearing I prefer to install new ones. These are a very common size. I used 6205RS (thanks Steve for the tip !)
Press them back in.
Tada ! Painted flanges and ready to be mounted.
Found bits on the web with how to do, took me a while to figure out. So here is the full job with photos, maybe it'll save you some time.
First step, take out the snap ring.
Then capture the bearing with one of these bearing extractor tool. Could not have done it without it because the gap to catch the bearing is so small there is no way to rig something up.
I prefer to catch at the bearing than from the flange below because I tried from the flange on a spare one and it started bending.
Put it in the press and apply the tons ! Beware, it will take a lot of pressure and come out with a bang.
Push the old seal out with the right size sockets
Press the new seal in
Ready for installing the new bearing. At less than $10 per bearing I prefer to install new ones. These are a very common size. I used 6205RS (thanks Steve for the tip !)
Tada ! Painted flanges and ready to be mounted.
Subscribe to:
Comments (Atom)


