So...
Now that I tidied my new garage and found all the spitfire parts, for the past 2 months I have been working on the car when I had a bit of time. Slow progress as I had a major work (5 full days) on an other car replacing the V8 engine this summer (quite a story...) and I always have to do a few things to my 1985 daily driver.
Basically the goal is to be able to start the engine and drive round the block asap.
It will probably not be perfect but now I feel it is more important to get it going and I will continue slowly but at least have a fun car to take out.
Completely cleaned and painted the water pump and fan and installed the radiator
Then set the valve gaps to the correct values
The engine bay is starting to look like it should. Exciting, more photos soon !
I will try to keep this blog updated with my progress on my new project : a 1967 triumph spitfire mk3. Hoping this will help others and hoping I will get help as I would like to do things right.
Tuesday, October 27, 2015
Saturday, October 3, 2015
Time flies
A lot of time went by since this happened.
The spitfire was delivered in France in a container in April 2014. It had to go from the container to truck then down on the pavement. I looked and looked for these photos but just remembered my phone crashed around that time causing the loss of the photos.
Not much was done to the car since we moved an other time to a place with a bigger garage (yeah !) and then I had to do some fixes on our 2 daily cars.
However I now finally sorted all my parts and ready to make some progress!
The spitfire was delivered in France in a container in April 2014. It had to go from the container to truck then down on the pavement. I looked and looked for these photos but just remembered my phone crashed around that time causing the loss of the photos.
Not much was done to the car since we moved an other time to a place with a bigger garage (yeah !) and then I had to do some fixes on our 2 daily cars.
However I now finally sorted all my parts and ready to make some progress!
Thursday, February 27, 2014
Spitfire gets on a boat
This post is 2 weeks overdue.
As maybe you could tell i had some serious fire under my &$$ to get this project moving !
Reason is we are moving from the US to France and spitfire is coming with us. Engine is in ready to be setup once on the other side of the atlantic.
It's been manic and i'll be happy to start again in a few weeks, full of energy.
As maybe you could tell i had some serious fire under my &$$ to get this project moving !
Reason is we are moving from the US to France and spitfire is coming with us. Engine is in ready to be setup once on the other side of the atlantic.
It's been manic and i'll be happy to start again in a few weeks, full of energy.
Thursday, February 6, 2014
Did I mention massive progress ?
A picture will speak better than words. Notice the freshly painted engine in the foreground.
Big thanks to Ben and Thomas for helping push through this week !
Tuesday, January 28, 2014
Spitfire engine rebuild, part 2 - Crankshaft
Really not an expert an this but after some mistakes 10 years ago I am really attempting to do this "by the book", see it's on the table :-)
Obsessive compulsive will be the key !
Started by putting the block on the engine stand and having all the parts set on the table.
We used the best crankshaft, it was ground 20 under.
Then gently dropped the crank in there, put plastigage.
Install the other part of the bearing and housing and torque (65)
Note that the bearing caps can't be mixed up and have directions. There were machined in place so that everything aligns perfectly.
Checking the plastigage we are at 0.0015 sounds good. Had a bit of a scare as it seemed very narrow but once I wiped the assembly oil I could see it was wider.
See what these look like.
Checking the float here. You lever left and right and see how much it moves
Was at 8 tho. wich is the end limit so in the end I put the +5 on the outside and the std on the inside, bringing me to 5 tho. of float.
Oiled the cylinders and onto next step !
Obsessive compulsive will be the key !
Started by putting the block on the engine stand and having all the parts set on the table.
We used the best crankshaft, it was ground 20 under.
First step was to install the lower part of the bearing. Hole needs to align withe the one in the block for oil supply. Using assembly lube on all bearings. Bearings are at 20 over to match the crankshaft.
Then gently dropped the crank in there, put plastigage.
Install the other part of the bearing and housing and torque (65)
Note that the bearing caps can't be mixed up and have directions. There were machined in place so that everything aligns perfectly.
Checking the plastigage we are at 0.0015 sounds good. Had a bit of a scare as it seemed very narrow but once I wiped the assembly oil I could see it was wider.
Then onto thrust washers, these fell of the first engine I disassembled and I had no idea where the came from or the purpose. They are here to control the lateral position of the crank.
You can buy them oversize as I had no idea I bought std, +5 and +10.
See what these look like.
Checking the float here. You lever left and right and see how much it moves
Was at 8 tho. wich is the end limit so in the end I put the +5 on the outside and the std on the inside, bringing me to 5 tho. of float.
Oiled the cylinders and onto next step !
Sunday, January 26, 2014
Spitfire gearbox prep
Started to prepare the transmission while the engine was being machined.
Peeked inside and it doesn't look too bad. Apart from quite a bit of metal particles collected on the magnet. Will probably need to revisit later for synchros...
I was surprised to hear there is no seal at the front on these ones, just a screw type mechanism to push the oil away. So don't park your car nose down on a hill !
Used the clutch fork that had the least amount of play and fitted the new clutch bearing.
Peeked inside and it doesn't look too bad. Apart from quite a bit of metal particles collected on the magnet. Will probably need to revisit later for synchros...
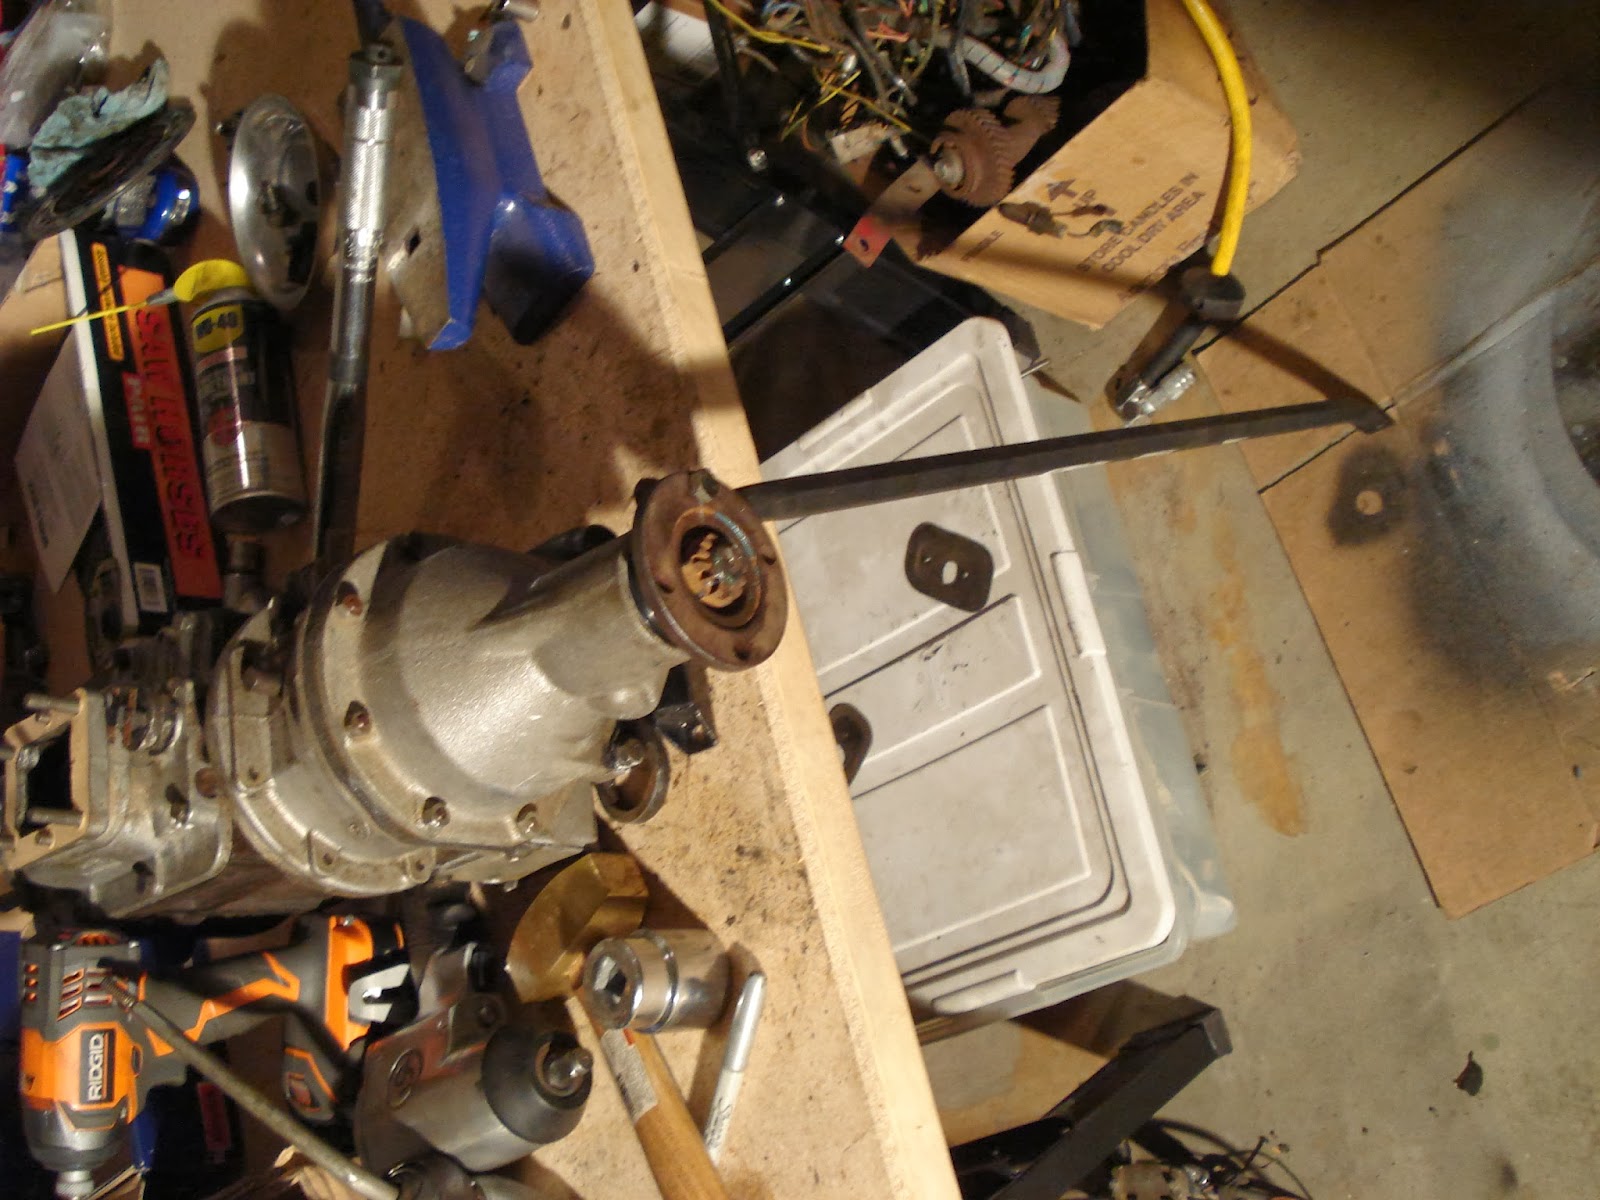
Wanted to replace the seals so that at least it doesn't leak on the garage floor. Had to remove the flange for the rear one. Had to use the usual amount of penetrating oil + heat + impact gun.
See my "red neck" technique for locking the flange into place.
Once removed, pulled out the old seal and pushed new one in with a large socket.
I was surprised to hear there is no seal at the front on these ones, just a screw type mechanism to push the oil away. So don't park your car nose down on a hill !
Used the clutch fork that had the least amount of play and fitted the new clutch bearing.
My technique for removing the old bearing. It's simply pushed in.
Final result, I have to admit the biggest pain was cleaning and painting the bellhousing. 30 years of oil took a while to clean. Hence my obsession with seals, the new one has to remain clean !
Friday, January 24, 2014
Spitfire engine rebuild, part 1 - Machining
Engine had been completely disassembled to realize that the bore measures at around 40 sometimes 60 over. So I decided to use the block from the parts car that was within spec (2.900).
My parts car came with a rebuilt head but it turns out that one is from a later car with the air injection for pollution and different compression so we'll just use it for some of the parts.
Still with the plan to do everything myself I ordered all the parts and will be doing the assembly but there are some things you just can't do yourself such as machining the block.
Went for the big package and it's a lot of machine work (so it's expensive... this one is for my wife :-) ). Doesn't really make sense to spend so much time and money then skip one of the items.
- Block deck + bore at 20 over
- Grind crankshaft at 20 under
- Recondition rods
- Install cam bearings
- Align hone block
- Deck head + Install guides and hardened seats on exhaust valves
- A few helicoils for the pan
- Grind the flywheel
Check out that photo lots of shiny parts, so exciting !
Starting to fall in love with my engine :-) We'll see if that lasts the week end after assembly.
My parts car came with a rebuilt head but it turns out that one is from a later car with the air injection for pollution and different compression so we'll just use it for some of the parts.
Still with the plan to do everything myself I ordered all the parts and will be doing the assembly but there are some things you just can't do yourself such as machining the block.
Went for the big package and it's a lot of machine work (so it's expensive... this one is for my wife :-) ). Doesn't really make sense to spend so much time and money then skip one of the items.
- Block deck + bore at 20 over
- Grind crankshaft at 20 under
- Recondition rods
- Install cam bearings
- Align hone block
- Deck head + Install guides and hardened seats on exhaust valves
- A few helicoils for the pan
- Grind the flywheel
Check out that photo lots of shiny parts, so exciting !
Starting to fall in love with my engine :-) We'll see if that lasts the week end after assembly.
Monday, January 20, 2014
Sunday, January 19, 2014
Spitfire steering column and bushes
Not been posting every day but I have been busy !
The steering wheel is back on the car and it should be not much appart from cleaning and painting... normally...
Well, i had my usual lot of troubles :
- the bushes were really hard to get out. Drilled the plastic part but still required too much banging to get out. Had to use a large metal bar with the right size socket. Next time i wont bother and just push them inside, cant hurt.
- in fact the column was bent. Had to mix and match with the parts car. This parts car has been a life savior really.
- tightened everything to the right torque, important so the steering column can collapse properly in case of an accident.
The steering wheel is back on the car and it should be not much appart from cleaning and painting... normally...
Well, i had my usual lot of troubles :
- the bushes were really hard to get out. Drilled the plastic part but still required too much banging to get out. Had to use a large metal bar with the right size socket. Next time i wont bother and just push them inside, cant hurt.
- in fact the column was bent. Had to mix and match with the parts car. This parts car has been a life savior really.
- tightened everything to the right torque, important so the steering column can collapse properly in case of an accident.
Friday, January 10, 2014
Triumph spitfire heater box
The spitfire heater presents a few fun challenges :
1. Some of the parts have become unavailable or extremely pricey.
2. From its exposure to the elements and potentials it has a lot of rust after 40+ years
3. It is in an awkard location and many have to come out to grant access so you want this done right not to have to revisit.
Let's look at this point by point :
1. Luckily i had 3 used boxes and had to mix and match parts to make a good one. Only one of the 3 heater cores had no leak (tested submerged in water with air pressure). One of the 3 had a stronger and nicer working flap system. Had had a good motor.
2. Cleaned the rust and sprayed gloss black. Now as i said it is exposed to the elements so you want to try to get the seals replaced but they aren't made anymore. Escpecially the one that fit around the entry / exit hose. The old ones have become hard and brittle and resemble cookies that have forgotten in the closet. In the end i made my own using house pipe insulation and it looks good and seems functional. Used window seal tape to create the seal around the fan hole.
But double sided foam tape as well where the core touches the body as the original one had clearly disintegrated.
3. Install and pray
Photo below of the heater ready to be installed, tada !
1. Some of the parts have become unavailable or extremely pricey.
2. From its exposure to the elements and potentials it has a lot of rust after 40+ years
3. It is in an awkard location and many have to come out to grant access so you want this done right not to have to revisit.
Let's look at this point by point :
1. Luckily i had 3 used boxes and had to mix and match parts to make a good one. Only one of the 3 heater cores had no leak (tested submerged in water with air pressure). One of the 3 had a stronger and nicer working flap system. Had had a good motor.
2. Cleaned the rust and sprayed gloss black. Now as i said it is exposed to the elements so you want to try to get the seals replaced but they aren't made anymore. Escpecially the one that fit around the entry / exit hose. The old ones have become hard and brittle and resemble cookies that have forgotten in the closet. In the end i made my own using house pipe insulation and it looks good and seems functional. Used window seal tape to create the seal around the fan hole.
But double sided foam tape as well where the core touches the body as the original one had clearly disintegrated.
3. Install and pray
Photo below of the heater ready to be installed, tada !
Monday, January 6, 2014
Homemade camshaft handle
Pretty happy with my homemade camshaft handle for the spitfire.
Just a fat washer with 2 holes drilled for the bolts and rod welded onto it.
Tuesday, December 31, 2013
Major milestone !
The body is back on the chassis !
I know, i know... it still doesn't look like much of a car but believe me this is a major step (i might have dreamt of it these past few months).
The underneath, the inside and the firewall have been painted Triumph royal blue, the original color of the car.
Thank you Tyler and Jussi for giving me a hand unloading from the trailer.
I know, i know... it still doesn't look like much of a car but believe me this is a major step (i might have dreamt of it these past few months).
The underneath, the inside and the firewall have been painted Triumph royal blue, the original color of the car.
Thank you Tyler and Jussi for giving me a hand unloading from the trailer.
Sunday, December 29, 2013
Spitfire body tub mounting points
Exciting, I prepared all the nuts and bolts for the tub coming back tomorrow.
This might come in handy, here are all the connecting points and what they look like in real life :
Saturday, December 28, 2013
Spitfire overdrive retrofit, part 2 - The support plate
Telling the story as i make progress.
You will need a different support plate because the gearbox silent bloc is different on the overdrive.
Made one out of 1/8 steel or you could buy one from the usual suspects.
One thing that I did not think of is that the original plate is lowered on the rubber mounting point. Would not have thought of that but a trick i was suggested is to mount the plate underneath (thank you Thomas)
See the photo with the old plate sitting on the right for comparison.
You will need a different support plate because the gearbox silent bloc is different on the overdrive.
Made one out of 1/8 steel or you could buy one from the usual suspects.
One thing that I did not think of is that the original plate is lowered on the rubber mounting point. Would not have thought of that but a trick i was suggested is to mount the plate underneath (thank you Thomas)
See the photo with the old plate sitting on the right for comparison.
Installing and greasing the spitfire universal joints
Not a job I especially like. I somehow always end up putting grease everywhere (everywhere i dont want it like tools, hands and bench).
Now i have had a few "deja vu" while doing this :
1. Struggling to remove and install the new ones and telling myself it would have been just impossible without a press and flanges in this condition.
2. Installing the new UJ, putting the lockring on one side and wondering if i have the wrong size it really looked like the lockring would never go on the other side. It does eventually go in after more fiddling and pressure....
3. Using the grease nipple and gun after install and wondering why i simply didnt put lots of fresh grease inside before installing since it was all dismantled. Would have been easier, faster and cleaner.
Anyway, a good thing done. As well you can see on the photo, not leaving the grease nipple on but using these little screw plug.
Oh and driveshaft has been balanced and received a special treatment, more in a different post...
Now i have had a few "deja vu" while doing this :
1. Struggling to remove and install the new ones and telling myself it would have been just impossible without a press and flanges in this condition.
2. Installing the new UJ, putting the lockring on one side and wondering if i have the wrong size it really looked like the lockring would never go on the other side. It does eventually go in after more fiddling and pressure....
3. Using the grease nipple and gun after install and wondering why i simply didnt put lots of fresh grease inside before installing since it was all dismantled. Would have been easier, faster and cleaner.
Anyway, a good thing done. As well you can see on the photo, not leaving the grease nipple on but using these little screw plug.
Oh and driveshaft has been balanced and received a special treatment, more in a different post...
Monday, December 23, 2013
Waterproofing
11 hours of banging, sanding, welding today !
Sprint to get the tub ready for tomorrow. Almost every piece of rusty metal has been replaced.
Put new caulk as well where panels join, an english car needs to be ready for the rain !
Sprint to get the tub ready for tomorrow. Almost every piece of rusty metal has been replaced.
Put new caulk as well where panels join, an english car needs to be ready for the rain !
Saturday, December 14, 2013
Getting close !
Big progress today although I did not do as much as I had hoped.
Check this, starting to look good ! Not super happy with the junction I made for my floor but it will have to do.
Need to hurry and complete all the other patches needed so I can drop it for paint in a week.
This is what my workbench looked like today after an afternoon of work. Time to tidy !
Check this, starting to look good ! Not super happy with the junction I made for my floor but it will have to do.
Need to hurry and complete all the other patches needed so I can drop it for paint in a week.
This is what my workbench looked like today after an afternoon of work. Time to tidy !
Thursday, December 12, 2013
Replacing the ring gear on the triumph spitfire flywheel
Finally a job that did not take longer than expected !
My gears were in really bad shape as you can see on the photo. It is possible to buy just the ring part at an affordable price from the usual supplier.
Step 1 : Remove the old ring. I did a small hole followed by a bigger hole almost the same size as the ring. Once I was near completion of the bigger the ring cracked, relieving the pressure and I was able to remove easily.
Step 2 : Ring was resting on the end of an anvil, and heated it up with a torch. Not too hot but was checking size from time to time with a small rod you can actually see on the last photo. Not too hot is key, it did not get red and did not smoke.
Step 3 : Grabbed the ring with pliers and placed where it belong, went in not problem, no need to push or anything. Note that the bevelled size of the ring goes on the clutch side when you have the starter motor like me where the gear it outside and moves in when it rotates.
Voila !
My gears were in really bad shape as you can see on the photo. It is possible to buy just the ring part at an affordable price from the usual supplier.
Step 1 : Remove the old ring. I did a small hole followed by a bigger hole almost the same size as the ring. Once I was near completion of the bigger the ring cracked, relieving the pressure and I was able to remove easily.
Step 2 : Ring was resting on the end of an anvil, and heated it up with a torch. Not too hot but was checking size from time to time with a small rod you can actually see on the last photo. Not too hot is key, it did not get red and did not smoke.
Step 3 : Grabbed the ring with pliers and placed where it belong, went in not problem, no need to push or anything. Note that the bevelled size of the ring goes on the clutch side when you have the starter motor like me where the gear it outside and moves in when it rotates.
Voila !
Monday, December 9, 2013
Stitch welding
Second floor panel in in place.
Now that's what you call some stitch welding. Did an (offset) overlap, makes for much easier but better welds too.
Thursday, December 5, 2013
Spitfire overdrive retrofit, part 1 - The buy
Oh yeah, did I mention i was using the opportunity to add an overdrive ?
It gives an extra gear in 3rd and 4th, makes the driving nicer and hopefully cruising on the highway easier.
First i bought an overdrive mount that you can see on the left and now i will test fit it to see where it lines up on the base plate i made out of 3/16.
Will update as i progress on this overdrive saga.
Could not find anything at a reasonable price on ebay or ksl. Bought it from a contact on the forum, shipping was decent but of course no guarantee on the condition.
It gives an extra gear in 3rd and 4th, makes the driving nicer and hopefully cruising on the highway easier.
First i bought an overdrive mount that you can see on the left and now i will test fit it to see where it lines up on the base plate i made out of 3/16.
Will update as i progress on this overdrive saga.
Could not find anything at a reasonable price on ebay or ksl. Bought it from a contact on the forum, shipping was decent but of course no guarantee on the condition.
Subscribe to:
Posts (Atom)